

Game assets
Getting started with AssetLoom Studio
Build your first game-ready character in the browser: pick a free Starter, swap parts, shape and colour it, animate it, and export one rigged FBX or GLB.
By AssetLoom Team, published , Updated , 4 min read
AssetLoom Studio lets you build your own game-ready character in the browser, animate it, and export one rigged FBX or GLB for Unity, Unreal Engine, Godot or Blender. This guide walks you through your first character in about five minutes.
What it costs
Building, saving and previewing are free. You only spend credits when you export: 200 credits per export. New accounts get free welcome credits when they verify their email; the current amount is on the Pricing page. A failed or cancelled export gives its credits back automatically.
1. Pick a Starter
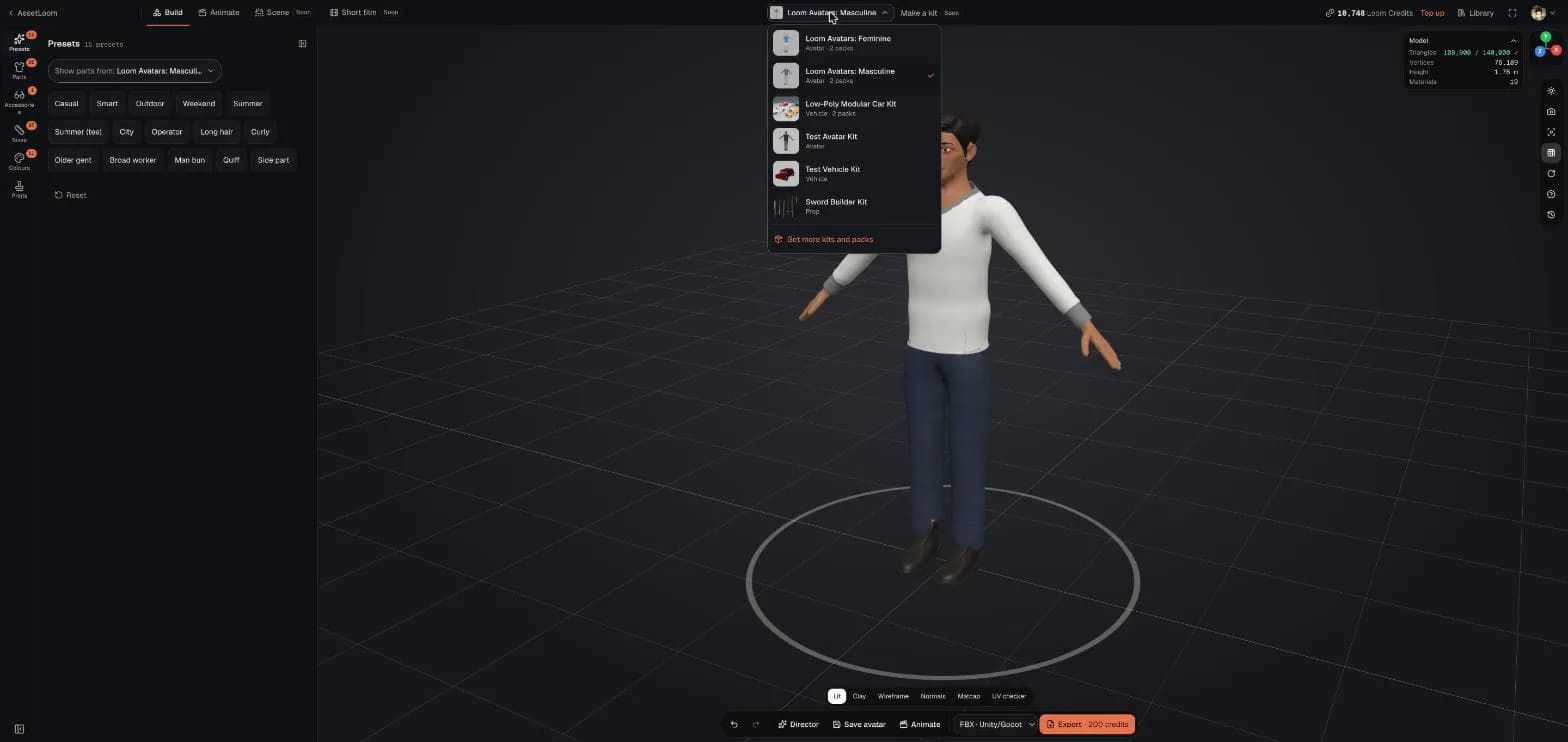
A Starter is the base you build from: a body with heads, hair and a first wardrobe. The two Loom Avatars Starters, Masculine and Feminine, are free. Get one from the store, then open Studio and choose it in the picker at the top.
2. Start from a preset
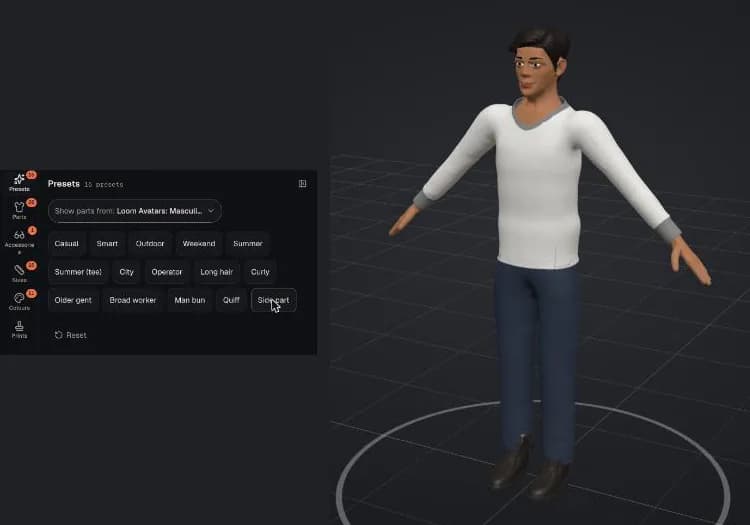
Presets are ready-made looks. Click one to dress your character in a single step, then change anything you like. Reset takes you back to the Starter's defaults.
3. Swap parts
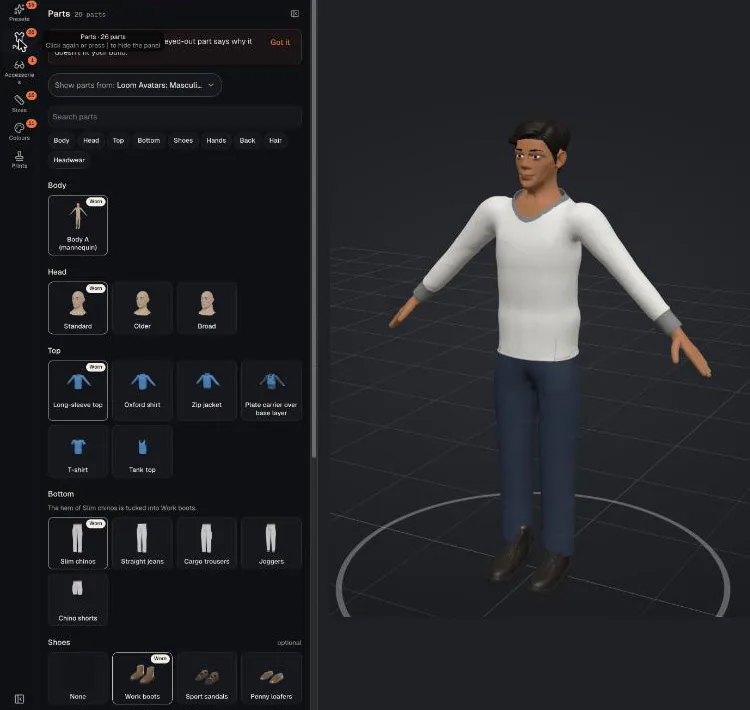
Open Parts in the left rail to change the head, top, bottoms, shoes, hair and headwear one at a time. Any combination is allowed: skin under clothes is removed and hats tuck long hair in, so nothing pokes through. A greyed-out part tells you why it doesn't fit your build.
4. Shape the body and face
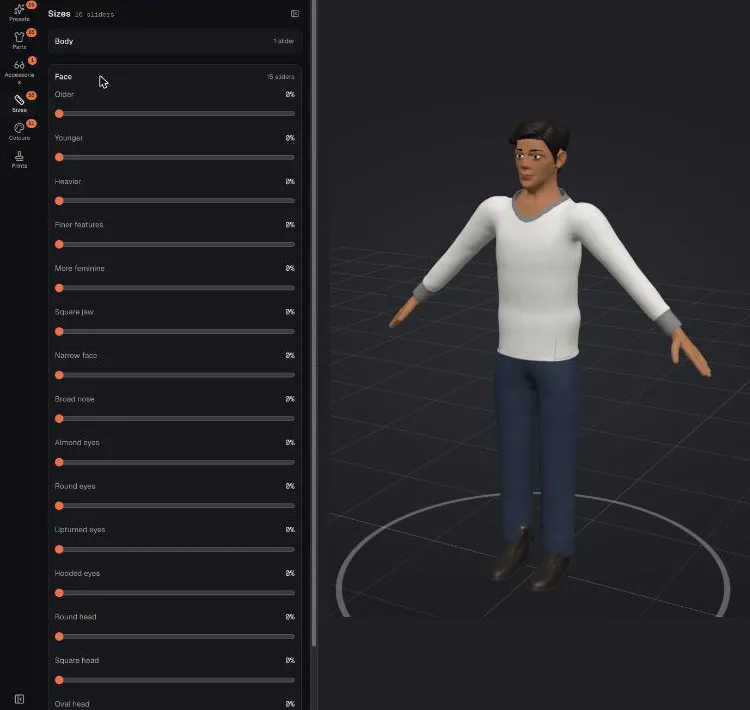
Open Sizes for the height slider and 15 face sliders: older or younger, heavier, jaw, nose, eye and head shapes. Your export keeps these proportions.
5. Choose colours
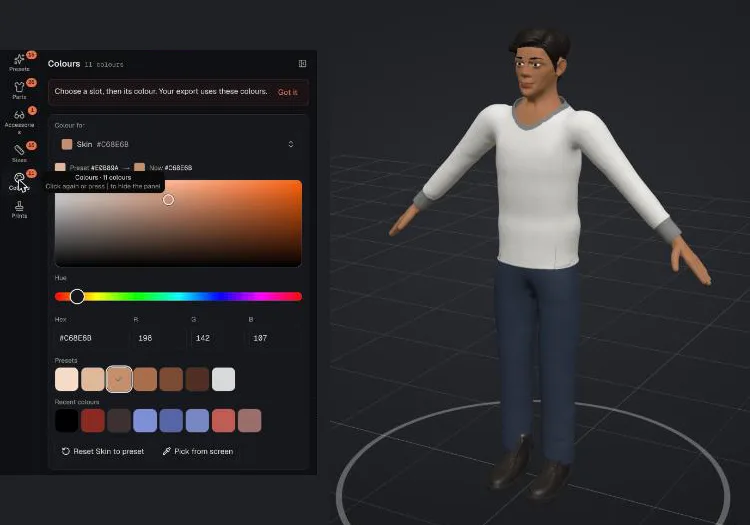
Open Colours, pick a slot such as skin, hair, eyes or a garment, then pick its colour. Use the Starter's presets, type a hex code, or pick a colour from the screen. Your export uses these colours.
6. Save your avatar
Press Save avatar in the bar under the 3D view and give it a name. Saved avatars are free and live in your Library, so you can come back to them, change them and animate them later.
Your Studio space
Saving is free, up to a limit: 50 avatars, 50 looks, 200 buildings (streets and parks too), 100 props, 50 vehicles, 24 prints and 64 MB of storage. Workspace Plus adds the same again for good, up to 4 times the free space: you earn a level by spending credits (at 1,000, 3,000 and 10,000 credits spent), or get one for 150 credits in your Wallet. Your Studio home shows how much you've used.
7. Animate it
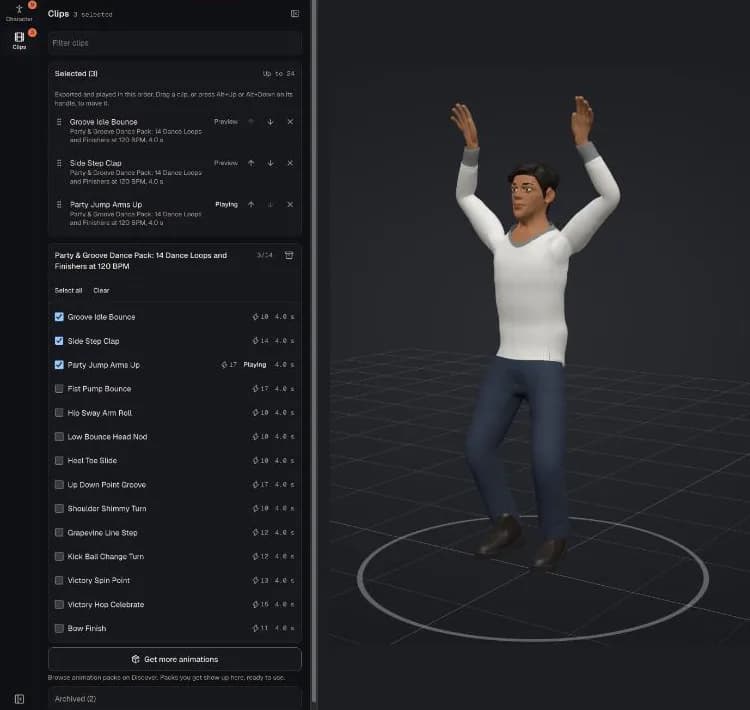
Press Animate to take your avatar into Studio Animate. Tick clips from the animation packs you own; they play on your character straight away, and you can reorder them. Up to 24 clips go into one file.
8. Export
Choose a format next to the Export button: FBX for Unity or Godot, FBX for Unreal, or GLB. Then press Export · 200 credits. You get one skinned mesh with its skeleton, textures and any clips you picked. Face morphs are kept for lip sync. When the export is ready, download it from Library › Exports. Downloading again, or exporting the exact same build again, is free.
Tips
- More outfits come in packs, such as the Halloween Costume Pack and the Sportswear Pack. Packs you own appear in Studio under their Starter.
- The view buttons under the 3D view (Clay, Wireframe, Normals) help you check the mesh before you export.
- Studio works best on a laptop or desktop. On a phone you can browse and preview, but building is easier on a bigger screen.
- Questions about what you can do with exported files? See How AssetLoom licences work.
- Bringing the file into your engine: Unity Humanoid setup and Unreal Engine 5 import.
Spotted a mistake or have a question? Email support@assetloom.io.