

Game assets
Build a high street shop in AssetLoom Studio
Build a game-ready shop in the browser with the High Street Shops Starter: presets, shopfronts, 17 shop types, furnished interiors, corner and L shapes.
By AssetLoom Team, published , 5 min read
The High Street Shops Starter is a building kit for Studio Build. You build a shop the way you'd build a house: a footprint on a grid, storeys, and a row of modules on each side that can be wall, window, door or shopfront. Studio puts the walls, cornices, roof and floors together, and the export is one engine-ready file with levels of detail and colliders.
What it costs
The High Street Shops Starter is 200 credits. Building, saving and previewing are free; you only spend credits when you export (200 credits per export), and exporting the same shop again costs nothing.
Two packs add more, each 100 credits: the Shop Types Pack and the Shop Interiors Pack. A pack does nothing on its own, so if you don't have the Starter yet, its page offers both together in one purchase.
1. Start from a preset
Open Studio, choose the High Street Shops Starter in the kit picker at the top, and pick one of its nine presets: Corner bakery, Café, Grocer, Bookshop, Barber, Restaurant, Florist, Convenience store or Modern boutique. Each is a whole shop with its brick, windows, door, shopfront, signs and colours, ready to change.
With the Shop Types Pack you get eight more: Pharmacy, Butcher, Hardware store, Corner pub, Post office, Launderette, Ice cream parlour and Toy shop. To see them, open Show parts from at the top of Presets and tick All packs (or the pack). Each shop type has its own shopfront, with different glazing, signs, pilasters, fascias, stallrisers and street dressing, and a furnished interior.
Clicking the Corner bakery preset, then the Pharmacy, Corner pub and Toy shop presets from the Shop Types Pack, switches the whole shop each time, each with its own shopfront.
2. Footprint and storeys
Open Building. Choose a Rectangle or an L shape, then set the width and depth with the steppers and the number of storeys (up to 3). A shop module is 4 m. An L shape adds a Wing length, which gives you a shop that turns a corner with a front on two streets.
When a change drops something, a note says so, for example "Facade modules that no longer fitted became wall: 3 windows." Press Undo to get them back.
3. Shopfronts, windows and doors
Under Facades, pick a side (front, right, back, left, and the wing's sides on an L shape). Each storey is a row of modules, seen from outside, left to right. Click a module to change it: wall, window, door or shopfront (G on the module). Doors go on the ground storey.
To change a run at once, drag along a storey. The module you press on changes to the next kind and every module you cross gets the same, so one drag along the ground storey can make the whole front a row of shopfronts.
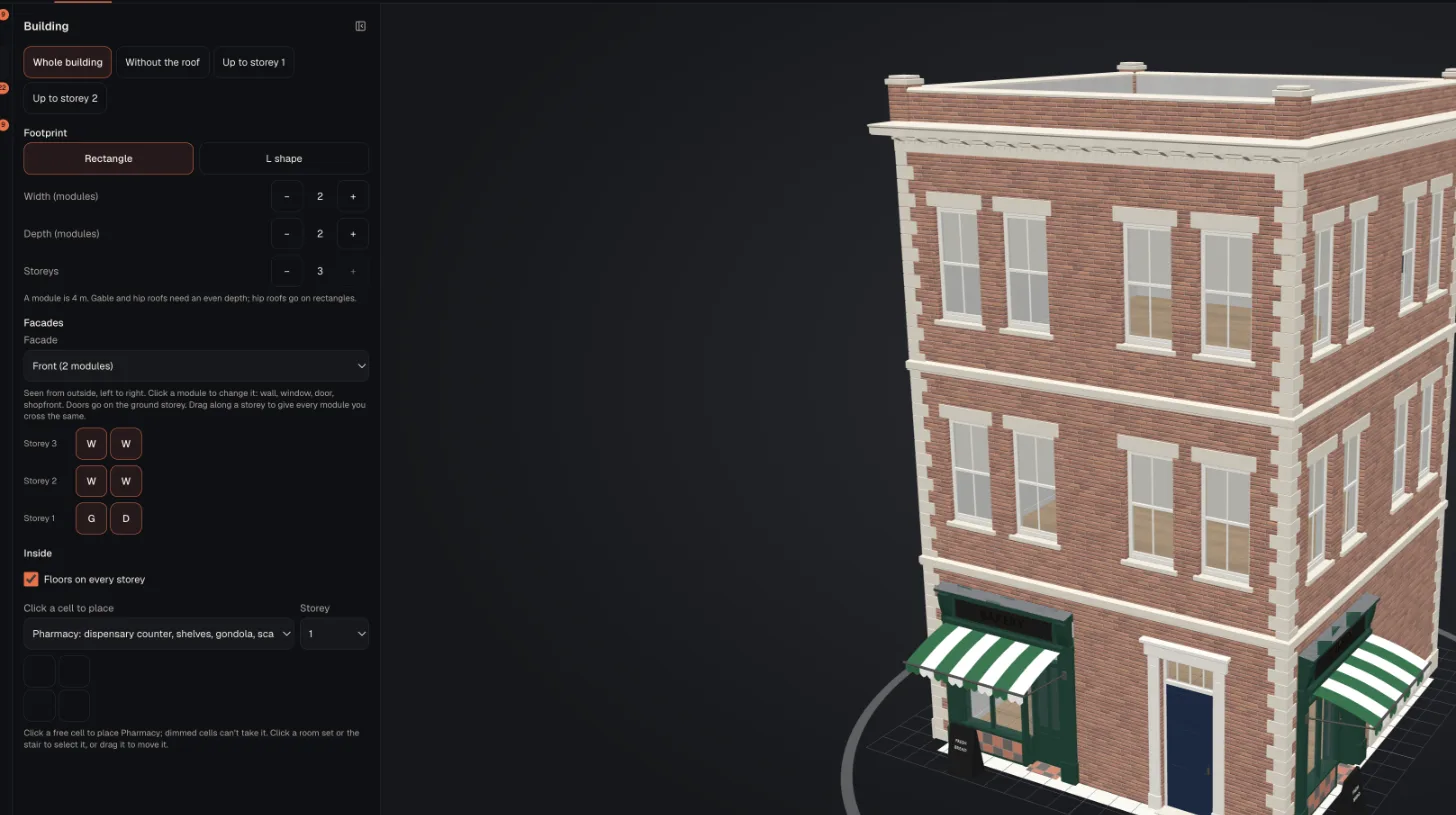
The styles come from the parts you choose in Parts: the brick or stucco, the upper windows (sash pairs, round-headed sash, wide modern), the street door, and the shopfront itself (bakery, café or grocer front with awning, and more). Change a part and every module of that kind changes with it. In Parts, the part your shop uses is marked Chosen.
4. Interiors on floor cells
Furnished interiors are room sets, placed on floor cells like the rooms in a house. In Building › Inside, keep Floors on every storey ticked, choose an interior under Click a cell to place, choose the Storey, and click a free cell on the floor plan. Cells it can't go on are dimmed.
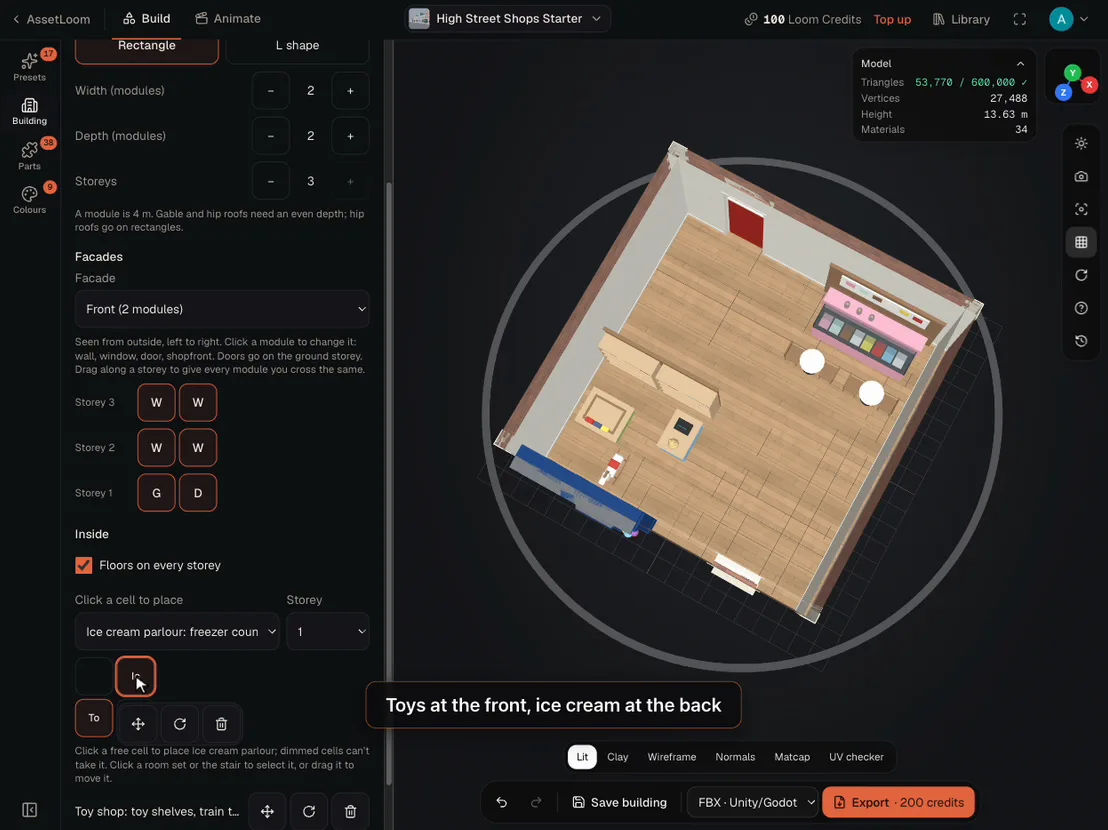
With the toy shop cut away to storey 1, the ice cream parlour interior is chosen, placed on a free floor cell with a click, then dragged to the cell at the back.
- Click a placed interior to select it, then drag it to another cell, turn it, or take it off with its buttons. Each one is also listed under the plan with the same buttons.
- If you choose an interior in Parts, Studio takes you to Building › Inside to place it.
- The interiors show through the shop windows in the preview and in your export.
| Pack | Interiors |
|---|---|
| Shop Types Pack | One for each of its eight shop types: pharmacy, butcher, hardware, pub, post office, launderette, ice cream parlour and toy shop |
| Shop Interiors Pack | Nine for the Starter's shops: bakery, café, grocer, bookshop, barber, restaurant, convenience store, florist and boutique |
5. Look inside
The buttons at the top of the panel switch the preview between Whole building, Without the roof and Up to storey 1 (or 2), so you can see the interiors from above. The export always has the whole shop.
6. Colours
Under Colours, each part of the shop has its own colour slot. Pick from the kit's swatches or set any colour.
7. Save and export
Press Save building to keep the shop (saving is free). Choose a format next to the Export button and export: one file with a mesh per storey and the roof, three levels of detail, box colliders with doorways left open, the interiors as their own objects, and a second UV set for baked lighting.
Tips
- A corner shop reads best as an L shape with a shopfront on both street sides.
- Start from the shop type closest to what you want, then swap the shopfront part or the colours to make it your own.
- Building a whole high street? Lay out the road with the Town Street Starter: see Build a street.
Spotted a mistake or have a question? Email support@assetloom.io.