

Game assets
Build a street in AssetLoom Studio
Lay out roads, pavements and street furniture in the browser with the Town Street Starter, place pieces by hand, draw road networks, then export.
By AssetLoom Team, published , Updated , 8 min read
The Town Street Starter is a building kit for Studio Build. You choose the street's shape and length and what runs along its pavements, then put pieces of your own wherever you want them: a bus stop, a fountain, a lawn, a funfair. Studio lays out the road, kerbs, pavements and street furniture for you, and the export is one engine-ready file with levels of detail and colliders.
What it costs
The Town Street Starter is 150 credits. Building, saving and previewing are free; you only spend credits when you export (200 credits per export), and exporting the same street again costs nothing.
Packs add more pieces: the Park Pack (100), the Pond & Lake Pack (100) and the Funfair Pack (150). A pack does nothing on its own, so if you don't have the Starter yet, its page offers both together in one purchase.
1. Start from a preset
Open Studio, choose the Town Street Starter in the kit picker at the top, and pick a preset: High street, 100 m (crossings, benches, a bus stop), Crossroads with signals, Quiet corner or Small town (road network). Then change anything you like; Reset takes you back to the Starter's defaults.
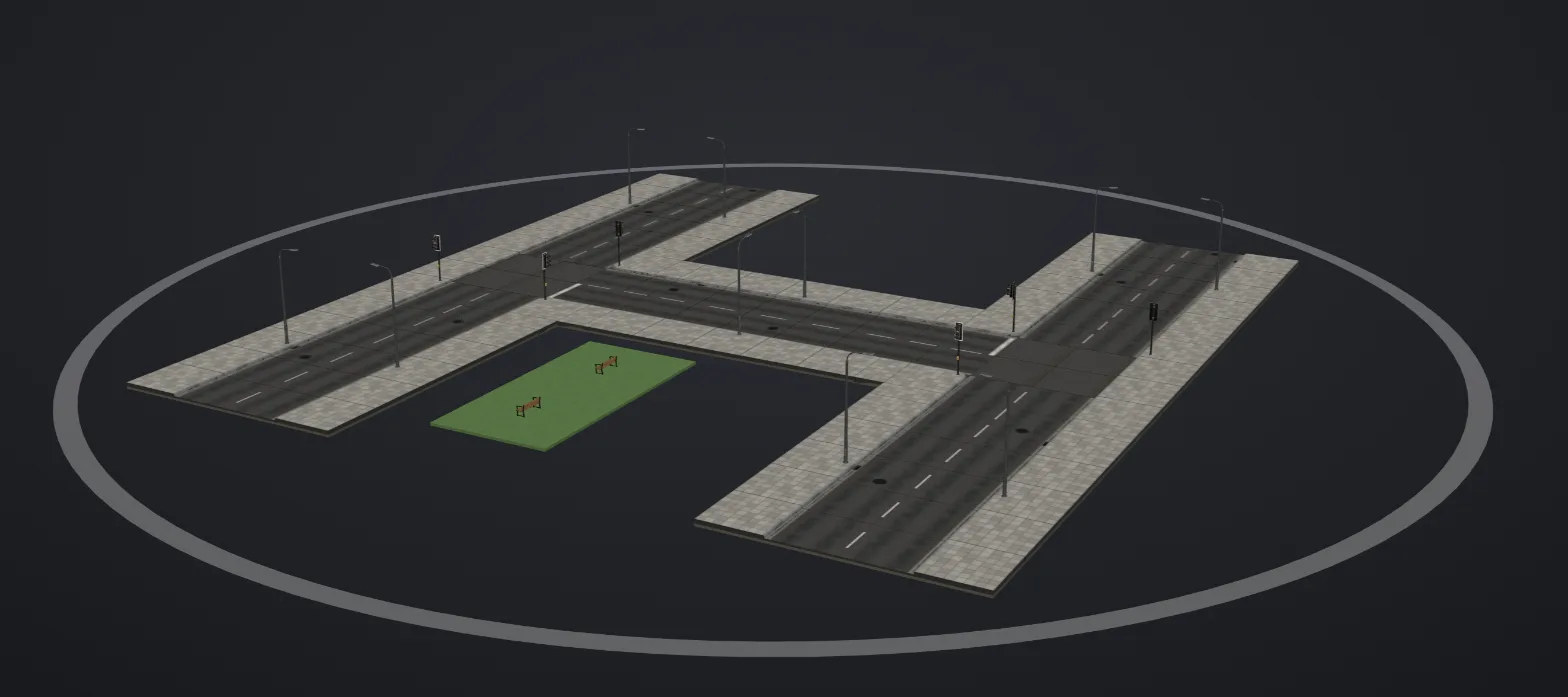
2. Shape and length
Open the Street section. Under Shape, choose Straight, Corner, T-junction, Crossroads, Road network (next step) or One piece. For a straight street, set the Length from 20 m to 100 m in 20 m sections. A street is 16 m wide: two traffic lanes with a kerb and pavement on each side.
3. Rows along the pavements
The rest of the section sets what runs along the street. Studio spaces everything for you and keeps pieces clear of each other (trees clear of lamps, the bus stop off the crossings).
- Zebra crossings: none, or every 1 to 5 sections.
- Rows on: both pavements, or only the left or right.
- Lamps, Trees and Benches: none, or every 10, 15, 20, 30 or 40 m.
- A bin by each bench and Bollards at crossings.
- Bus stop: which section and side it stands on.
- Railing or hedge: along both sides, the left or the right.
- Traffic: Right-hand (US) or Left-hand (UK); new streets start right-hand. It sets where junctions put their stop lines and signals (a straight street looks the same either way).
Under each row, picture cards show the parts you can use for it (Which lamp, Which bench, Which bin and so on). Click a card to use that part all along the row, or press Place one under it to put a single one by hand. Rows that need a part you don't have yet, such as trees or a railing without the Park Pack, say that a pack adds one. Left and right are seen walking along the street from its start.
4. Road networks
Choose Road network to lay roads on a grid of 20 m cells (up to 25 cells). Click a cell, or drag across cells, to draw road; click or drag on road to take it off. Each cell becomes a straight section, a corner, a T or a crossroads from the road next to it, so a loop of cells gives you a block of streets. You can also press Draw road in the 3D view and click cells there.
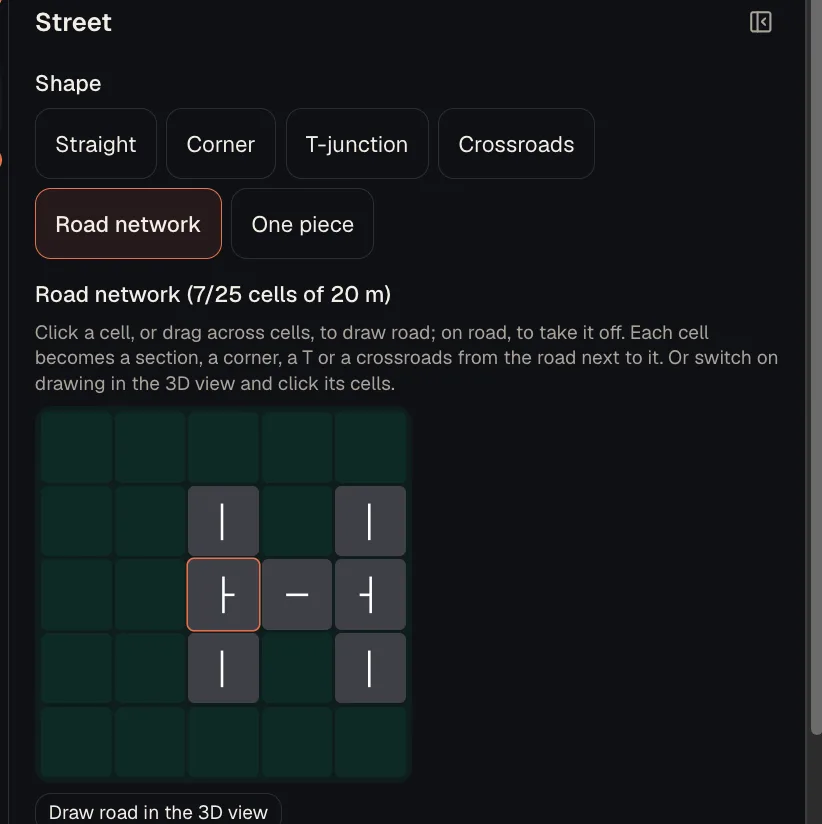
Choosing Road network and dragging across the grid draws a loop of roads; corners and junctions join up by themselves, and a second drag adds a side road.
- Every road cell must join the rest. A cell that doesn't is refused with "Draw next to the road you have".
- Start each drag next to road you already have: a drag that starts further away refuses its first cell.
5. Put pieces on the map or in 3D
Below the rows is every piece you own, each with a picture. Choose one, then place it on the map (the street from above, under the pieces) or straight in the 3D view. A ghost follows the pointer: green where the piece fits and red where it can't, with the reason shown above the view.
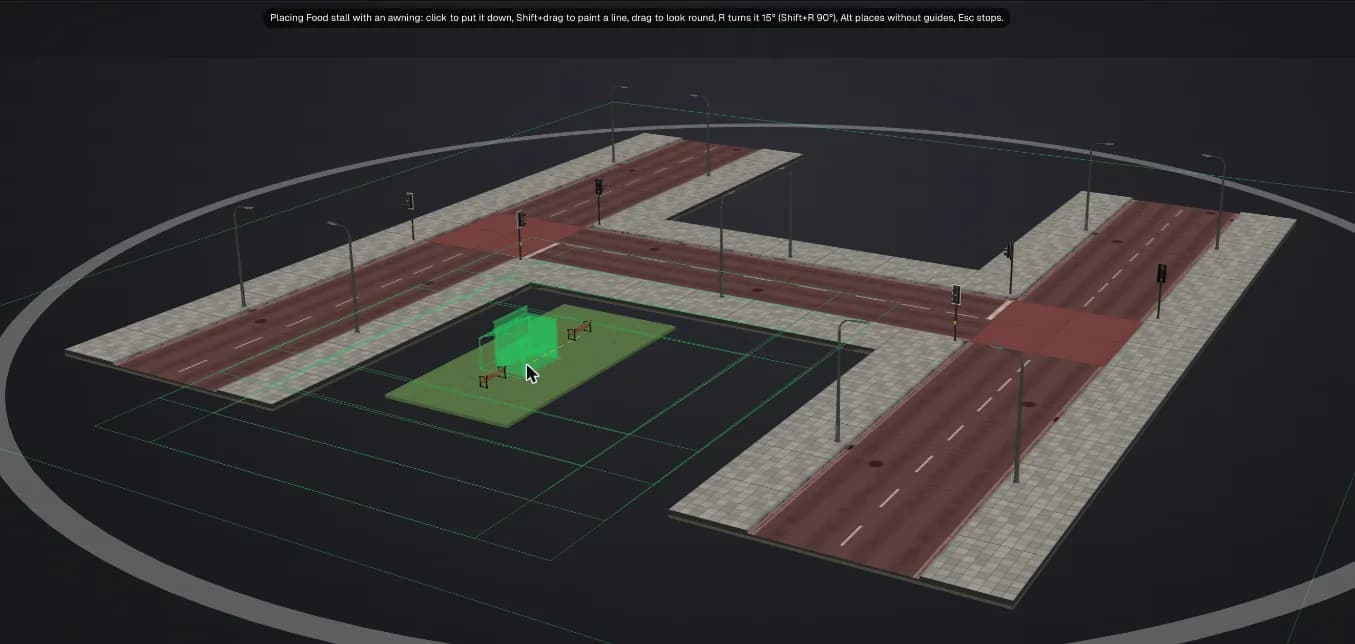
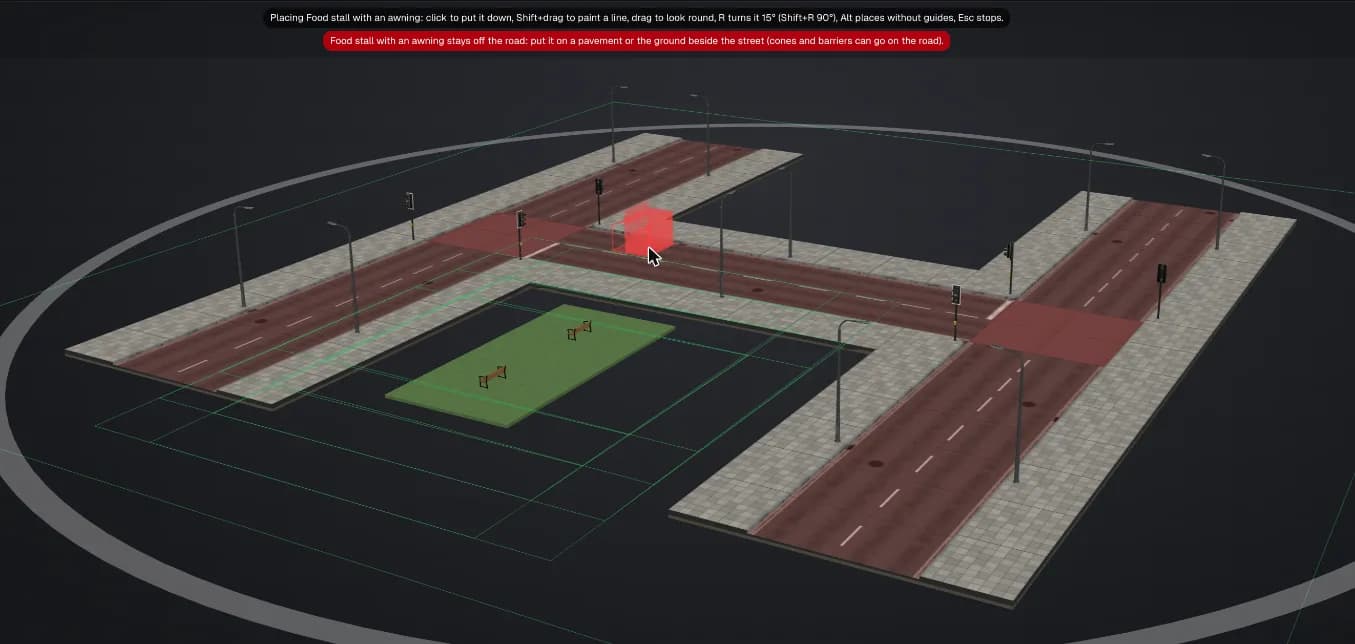
With the carousel from the Funfair Pack chosen, pointing at the road shows a red ghost and the reason it can’t go there; on the lawn the ghost turns green, and a click puts the carousel down.
The ghost snaps to the pavement's lines (kerb line, middle and back of the pavement), lines up with other pieces and keeps their spacing; hold Alt to place freely. Pieces face the road until you turn them. Click to put it down.
To change a piece you've placed, click it to select it:
- Drag it to move it, on the map or in 3D.
- Arrow keys move it 0.5 m (with Shift, 2 m).
- R turns it 15 degrees and Shift+R turns it 90 degrees, or drag the ring round it in 3D.
- Delete takes it off. Esc lets it go.
With the food stall chosen and pointing at the lawn, pressing R turns the ghost 15 degrees at a time before a click puts it down.
Keyboard only: choose a piece, focus the map, move the ghost with the arrow keys and press Enter to put it down. Every placement, move and turn is one step for Undo.
6. The placing rules
The rules keep the street something a game can use. In plain words:
- Pieces stand on the road, a pavement or the ground beside the street, never across a kerb.
- Street furniture and funfair rides stay off the traffic lanes. Traffic cones and concrete barriers are the exception: they can go on the road.
- A piece can't stand on another piece. Ground cover is the exception: water, lawns, grass and paths can have things on them, so a bench can sit on a lawn and a rowing boat on a lake.
- Grass grows the plot. Ground cover placed beside the street (or beside other ground cover that reaches it) makes the area you can build on bigger, so you can lay out a park or a lake next to the road and furnish it.
- You can place up to 40 pieces and 60 pieces of ground cover. If taking off a lawn would leave things standing too far from the street, Studio says so and offers to take them off with it.
7. Paint a line, fill an area
With a piece chosen, drag on the map (or Shift+drag in the 3D view) to paint a whole line of it, evenly spaced: a row of cones down a lane, bollards along a kerb, a hedge. In 3D you can also press P and use the arrow keys instead of the mouse. Ground cover fills the area you drag over instead, so one drag lays a lawn or a path.
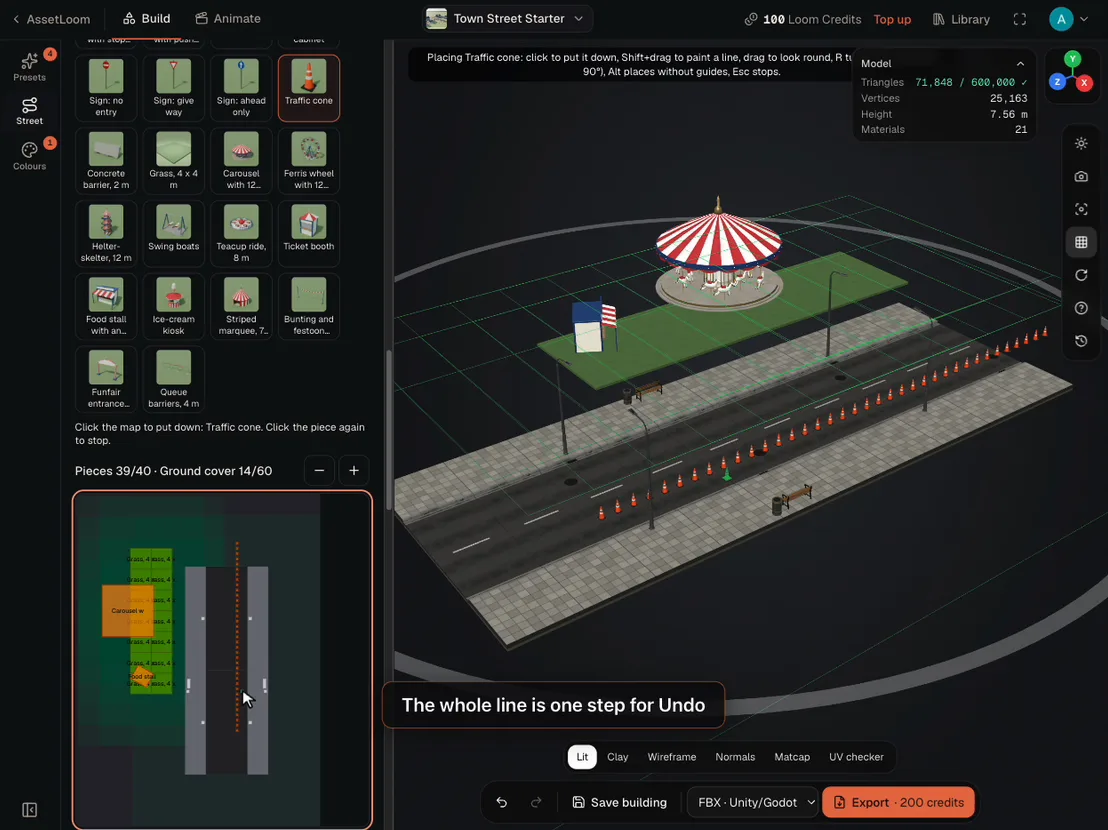
Choosing the traffic cone and dragging down a lane on the street map paints a whole line of cones in one step; cones and barriers can stand in a traffic lane.
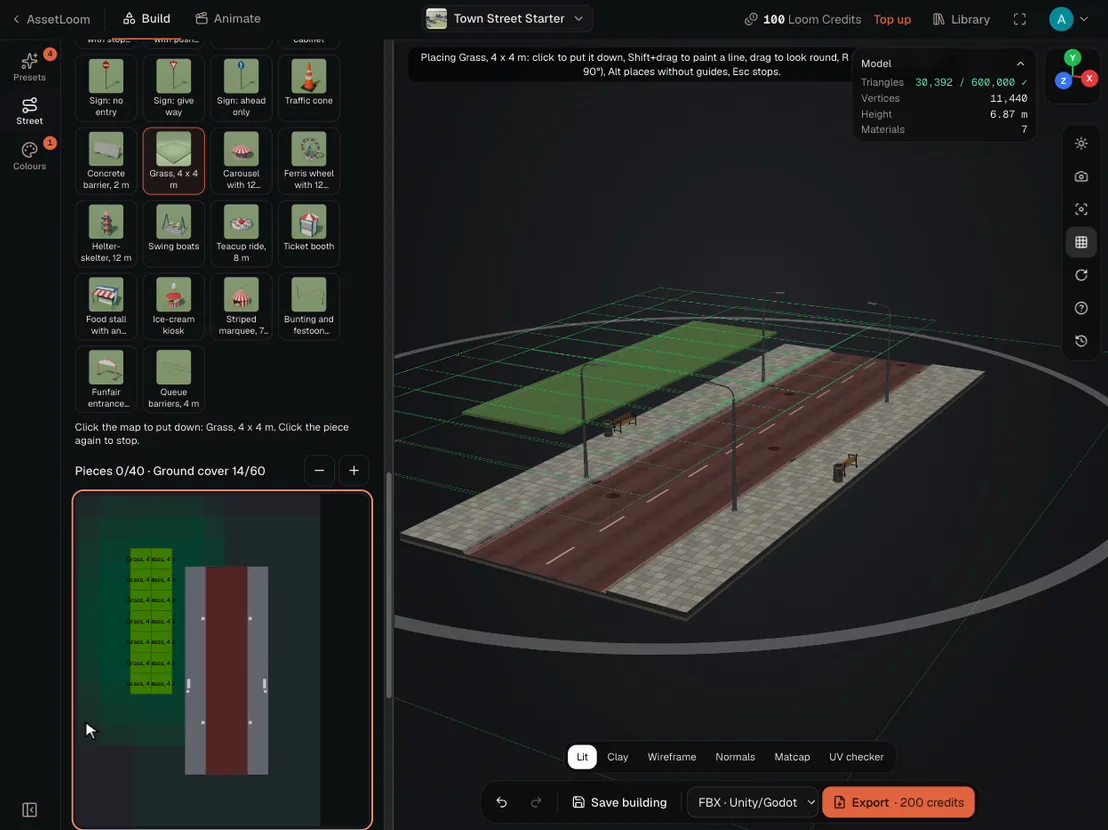
Choosing Grass, 4 x 4 m and dragging on the street map fills a lawn beside the road; the plot grows to take it, and lawns can hold benches, stalls and rides.
Pieces that wouldn't fit, or that would go past the street's limit, are skipped, and a note says how many were put down and why the rest weren't. A street holds 80 placed pieces and 120 tiles of lawn, path and other ground cover; each level of Workspace Plus adds the same again.
Rows: tick Place a row above the pieces, choose a piece and drag along where the row goes (or click its start, then its end) to line up trees, lamps, benches or anything else. The whole row counts as one piece toward the limit, copies that can't stand are skipped, and Left and right of the line staggers it to both sides. Click a row on the map to change its piece or its spacing later.
8. Packs for the street
| Pack | What it adds |
|---|---|
| Park Pack, 100 | Oak, lime and birch trees and a pine for the tree row, a heritage lamp post, park railings on a stone plinth and a clipped hedge for the edges, plus lawns, a gravel path, a park lawn with paths, a round flower bed, a two-tier fountain, a picnic table, a planter and park gates to place by hand |
| Pond & Lake Pack, 100 | 17 water pieces: lake shore tiles that join into any lake, open water, a stream and its bend, a natural and a formal pond, a timber footbridge and jetty, stepping stones, reeds, water lilies, a rowing boat, boulders and a lifebuoy post |
| Funfair Pack, 150 | A carousel, a Ferris wheel, a helter-skelter, swing boats and a teacup ride, plus a ticket booth, food stall, ice-cream kiosk, striped marquee, bunting, an entrance arch and queue barriers |
9. Save and export
Press Save building to keep the street (saving is free; it appears in your Library). Then choose a format next to the Export button and export. You get one file with the road, kerbs and pavements, every piece with its own levels of detail, and simple colliders for the road and pavement surfaces and the pieces you placed.
Tips
- Watch the counter above the map (for example "Pieces 12/40 · Ground cover 8/60") so you know how much room is left.
- Use the map for exact placing and the 3D view to check how it looks from the street.
- Want shops along it? See Build a high street shop.
Spotted a mistake or have a question? Email support@assetloom.io.